Upload Files Using API
This page shows you how to use the Filepicker widget to upload file data using API.
Prerequisites
- A Filepicker widget to upload files.
- Access to a cloud platform with API endpoints.
Configure query
Follow these steps to configure the API:
In the API configuration, specify the request method (POST or PUT) and provide your API URL, including any necessary path.
In the Body tab, select the encoding method that aligns with the API's requirements.
You can select any of the following methods:
- JSON
- FORM_URLENCODED
- MULTIPART_FORM_DATA
- RAW
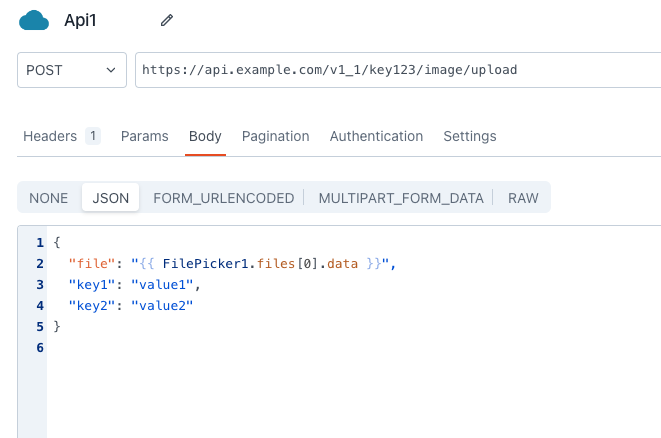
JSON is typically used when uploading files along with structured data, such as metadata or parameters. It is suitable for both single and multiple file uploads.

Example:
{
  "file": "{{ FilePicker1.files[0].data }}", // Accessing the file data
  "key1": "value1",
  "key2": "value2"
}
// [0] represents index of the file.
In this example:
file, corresponds to the file you want to upload, which should be selected from the FilePicker widget.- If you want to upload just the file data, use:
{{ FilePicker1.files[0].data }}. - If you want to upload all the details of a file, including format, type, name, and data, use:
{{ FilePicker1.files[0] }}. - If you want to upload multiple files, use
{{ FilePicker1.files }}.
- If you want to upload just the file data, use:
The
key1andkey2parameters can be customized to match the specific data you want to include in your API request. For instance, you can add a filename, file path, access key, or any other relevant parameters.
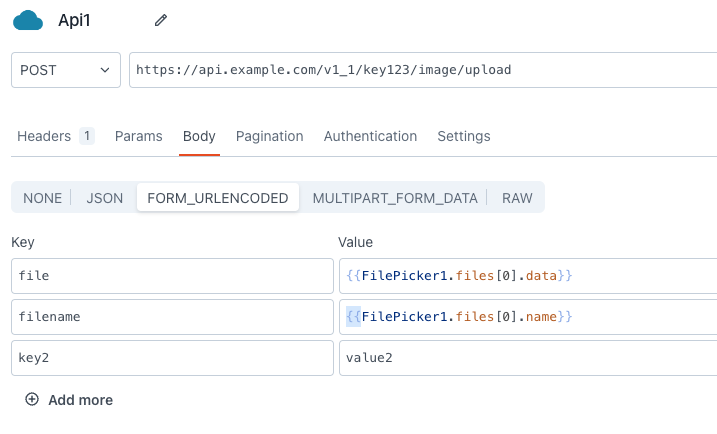
Form-urlencoded is a simple data format for API requests. It is suitable for single file uploads along with some form data. Each key-value pair represents a specific piece of information to be submitted to the API.

Example:
| Key | Value |
|---|---|
| file | {{FilePicker1.files[0].data}} |
| key_filename | {{FilePicker1.files[0].name}} |
| key1 | value1 |
In this example:
file, corresponds to the file you want to upload, which in this case is represented byFilePicker1.files[0].data, where0is the index of the selected file, anddatacontains the file data.The
key1parameter can be customized to match the specific data you want to include in your API request. For instance, you can add filename, filepath, access key, or any other relevant parameter.
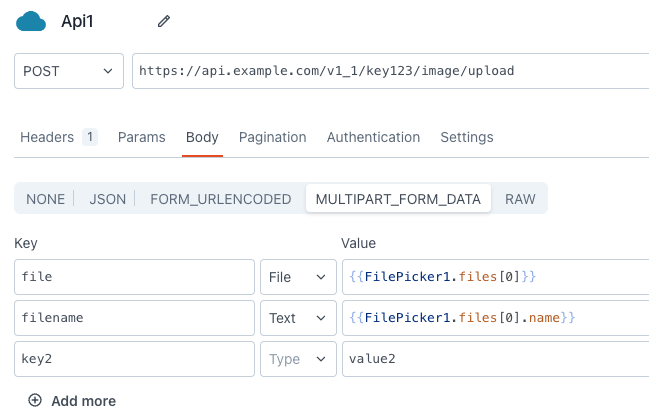
Multi-part form data is a flexible format for API requests. It is used when you need to upload multiple files or a combination of files and other form data.

Example:
| Key | Type | Value |
|---|---|---|
| file | File | {{FilePicker1.files[0]}} |
| key_filename | Text | {{FilePicker1.files[0].name}} |
| key1 | Text | value1 |
In this example:
file, corresponds to the file you want to upload, which should be selected from the FilePicker widget.- If you want to upload just the file data, use:
{{ FilePicker1.files[0].data }}. - If you want to upload all the details of a single file, including data format, type, name, and data, use:
{{ FilePicker1.files[0] }}. - If you want to upload multiple files, use
{{ FilePicker1.files }}.
- If you want to upload just the file data, use:
The
key1parameter can be customized to match the specific data you want to include in your API request. For instance, you can add filename, filepath, access key, or any other relevant parameter.
{
  "file": "{{ Filepicker1.files[0]?.data }}",
  "key1": "value1"
}
In this example:
file, corresponds to the file you want to upload, which should be selected from the FilePicker widget. The?operator is used to handle potential undefined values.The
key1parameter can be customized to match the specific data you want to include in your API request. For instance, you can add filename, filepath, access key, or any other relevant parameter.
Use RAW if your endpoint can't accept multipart-encoded data and requires raw body binary instead. Above, the data property of the file is passed to the query instead of the file object itself because the endpoint expects only raw binary data.
Be sure to turn off JSON Smart Substitution in the query settings for this specific query.
If you want to upload files of significant size, adjust the Query timeout settings in the API configuration.
Configure Filepicker widget
Follow these steps to configure the Filepicker widget to upload files:
Configure the Allowed file types property of the Filepicker widget to allow users to upload files of specific formats.
Configure the Data Format property to align with the data format expected by the API or platform you are using.
Set the Filepicker widget's onFilesSelected event to execute the query.
After completing these steps, select your file(s) and click the Upload File(s) button to send them to the server.
