Amazon Cognito
To configure Appsmith to use Amazon Cognito as an OIDC provider, follow these steps:
Prerequisites
- A self-hosted Appsmith instance. See the installation guides for installing Appsmith.
- Before setting up Single Sign-On (SSO), ensure that you have already configured a custom domain for your instance.
Create user pool
Log in to your AWS account. Go to Services > Security, Identity & Compliance > Cognito and follow the steps below:

- In the User Pools pane, click the Create user pool button.
- In the Configure sign-in experience pane, select the Email checkbox under the Cognito user pool sign-in options section. Click Next.
- In the Configure security requirements pane, select No MFA under the Multi-factor authentication section. Click Next.
- In the Configure sign-up experience pane, keep the default configuration and click Next.
- In the Configure message delivery pane, you can choose one of the email providers - Send email with Amazon SES or Send email with Cognito. If you don't have an Amazon SES account, select Send email with Cognito. Click Next.
- In the Integrate your app pane, follow the steps below:
- In the User pool name box, enter a name for your user pool.
- Under the Initial app client section, in the App client name box, enter a name for your app client.
- In the Client secret options, select Generate a client secret.
- Click Next.
- In the Review and create pane, review the configurations and click Create user pool.
Configure domain and app client
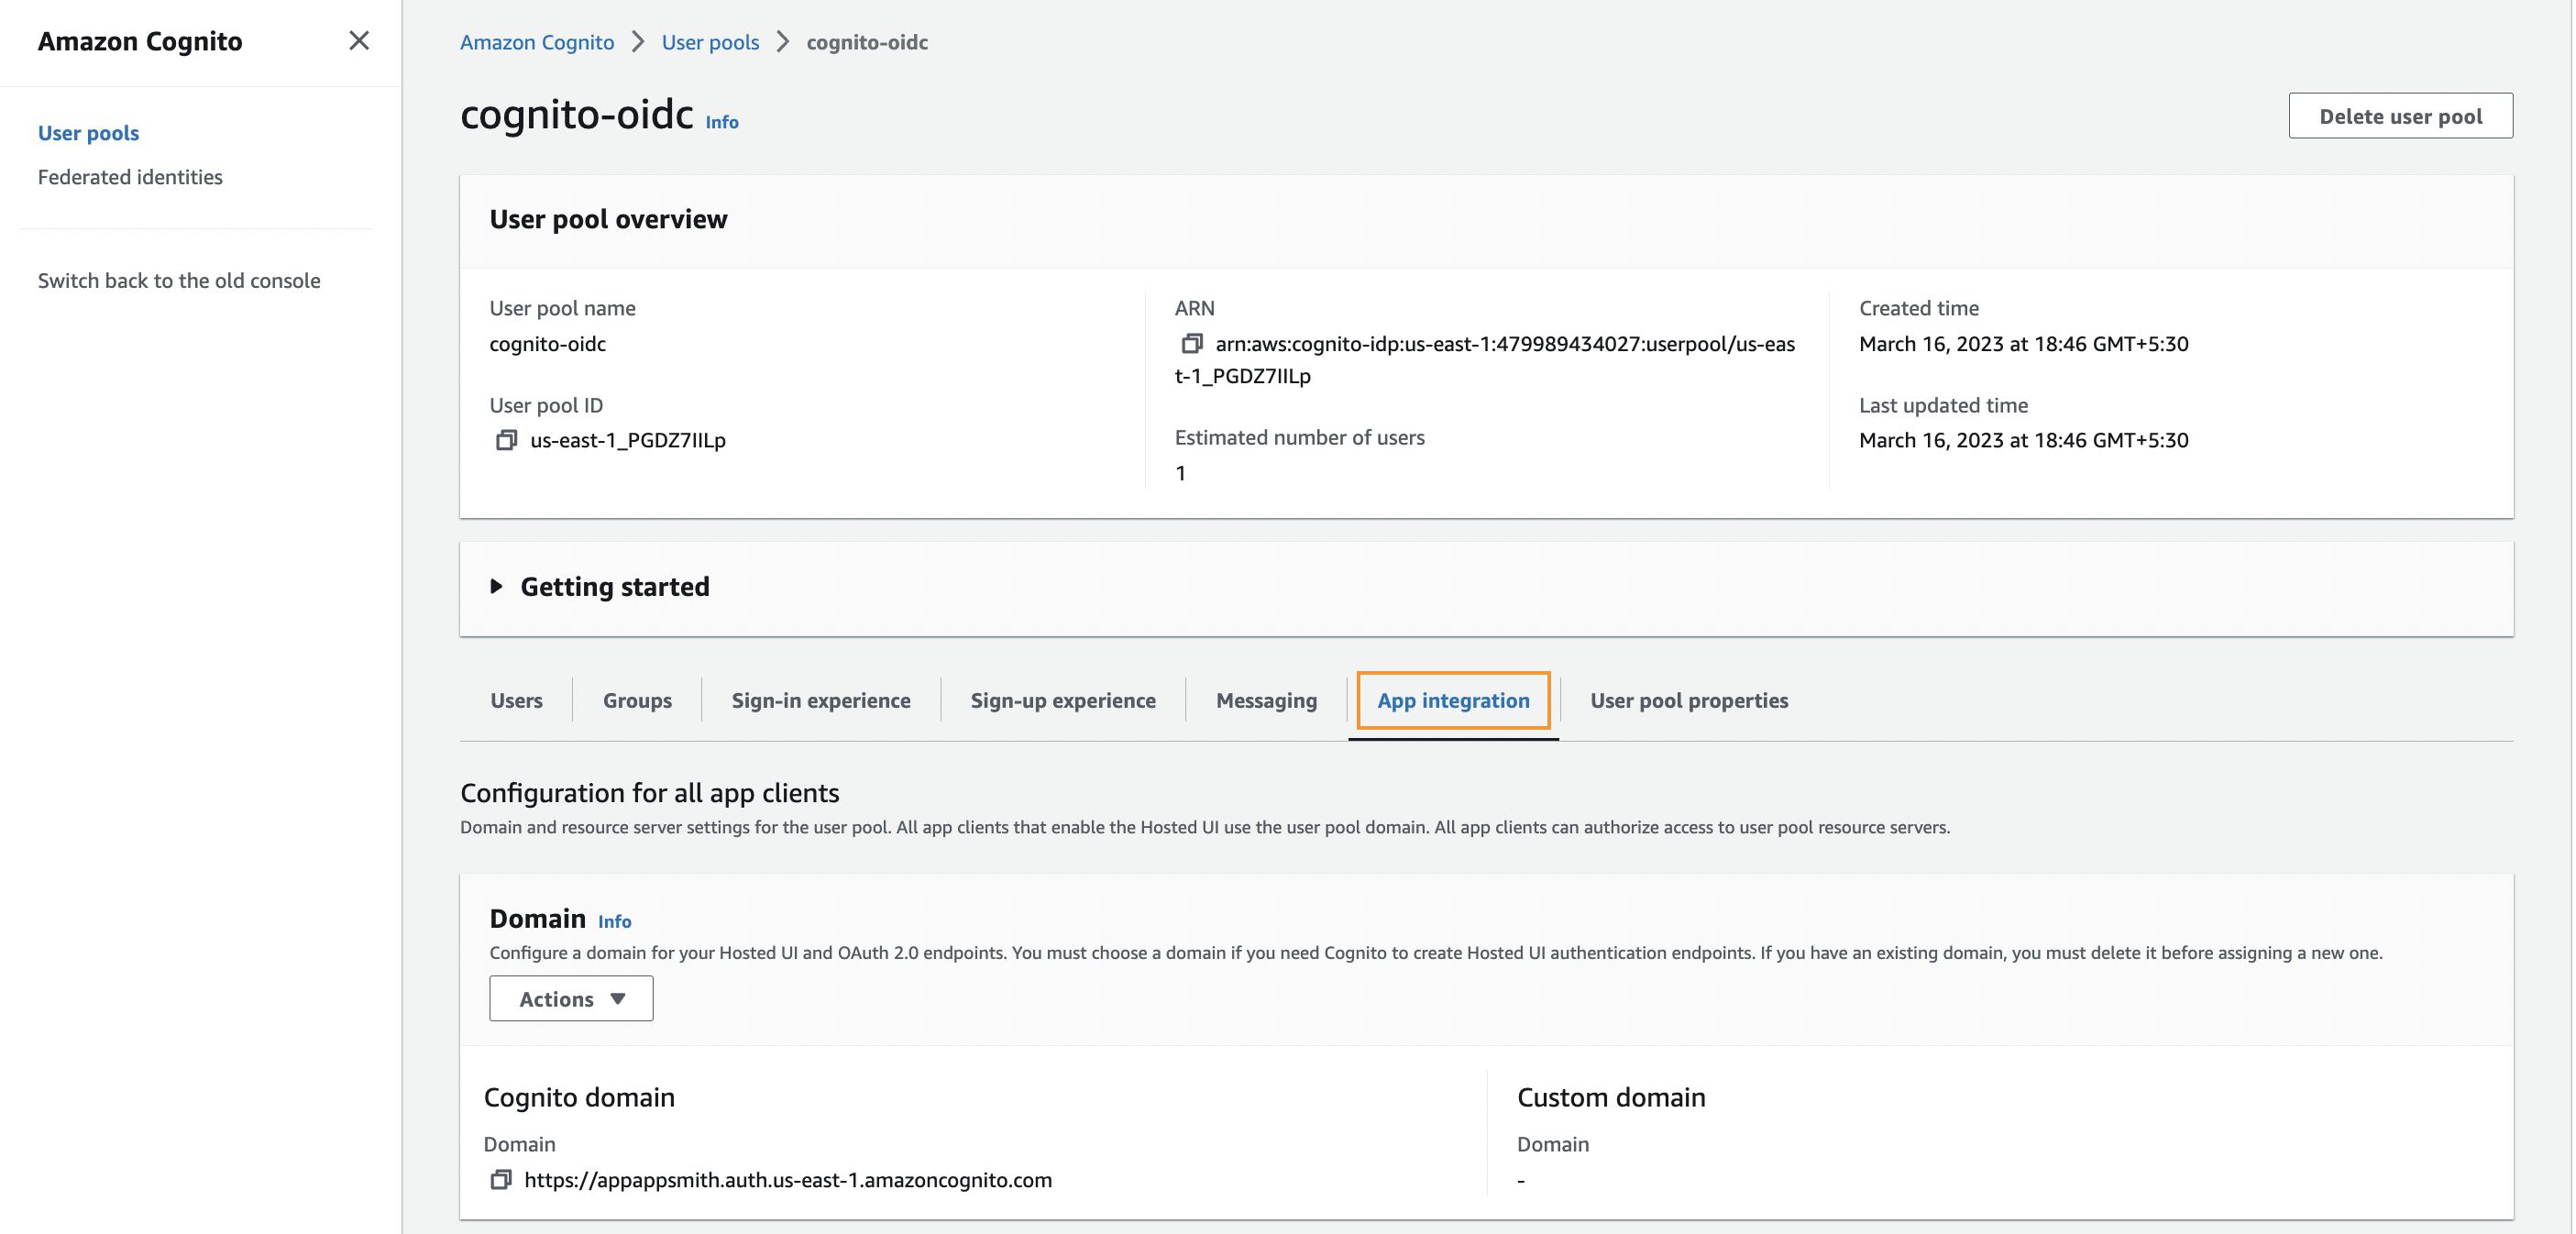
In the User pools pane, select the user pool you created in the preceding steps. Click the App Integration tab and follow the steps below:

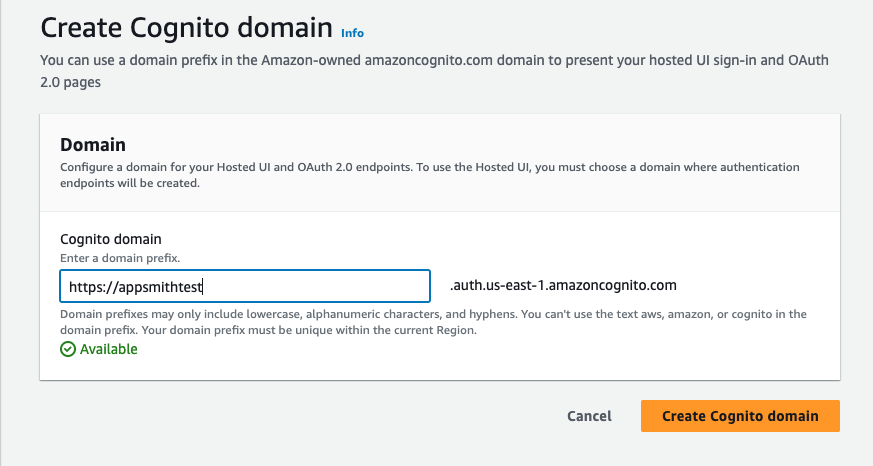
In the Domain section, click the Actions list and select Create a Cognito domain. You can also select Create a custom domain to add a domain that you own.
On the Create Cognito domain screen, enter a domain prefix in the Cognito domain box. Click Create Cognito domain.

Back on the App Integration tab, scroll down to the App client list section and click the name of the app client you created in step 6 of Create user pool.
Copy the Client ID and Client Secret and save them for later use.
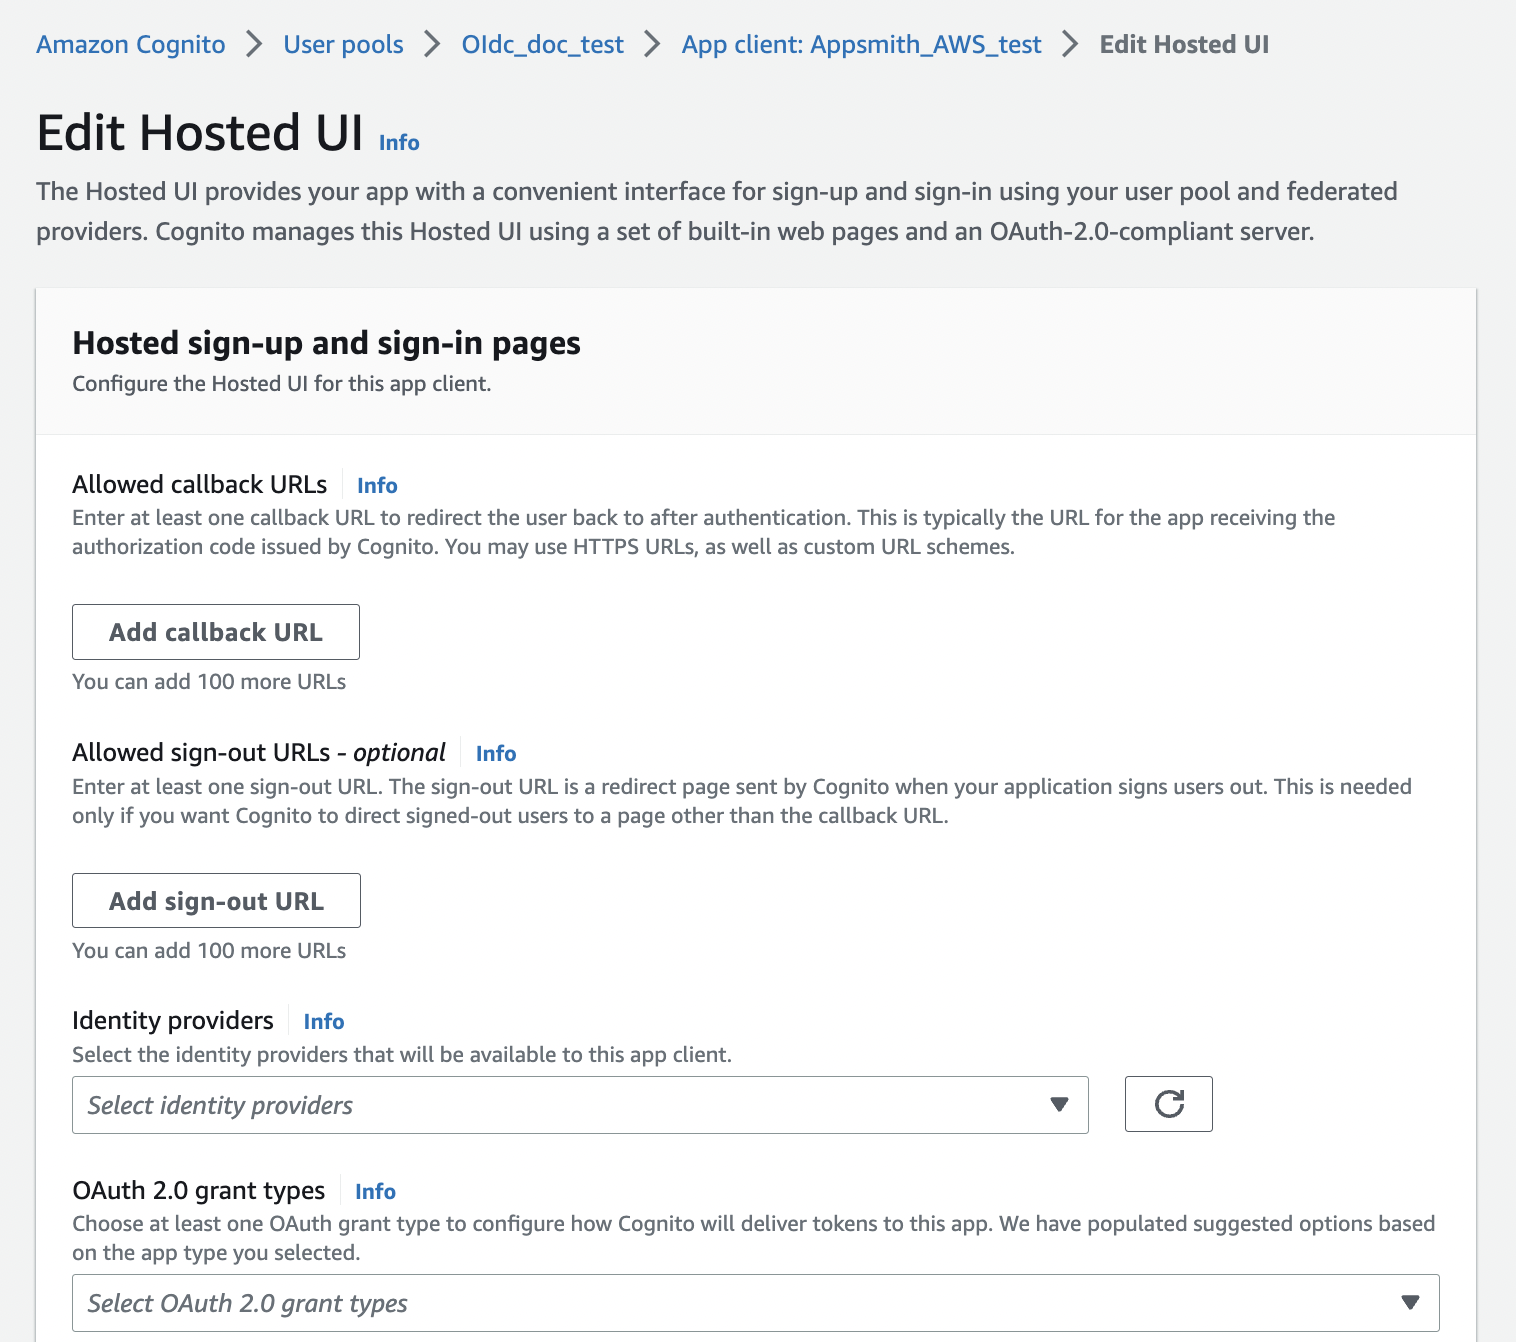
Scroll down to the Hosted UI section and click Edit. On the Edit Hosted UI pane, follow the steps below:

- Click the Add Callback URL button. In the URL box and enter the Redirect URL copied from the OIDC configuration in Appsmith.
- In the Identity providers list, select Cognito user pool .
- In the OAuth 2.0 grant types list, select Authorization code grant.
- In the OpenID Connect scopes list, select OpenID, Email, and Profile options.
- Click Save changes.
Setup Cognito SSO on Appsmith
On your Appsmith instance, go to Admin Settings > Authentication > OIDC, click Enable and follow the steps below:

Refer to the table below when entering data in the input boxes to configure the instance:
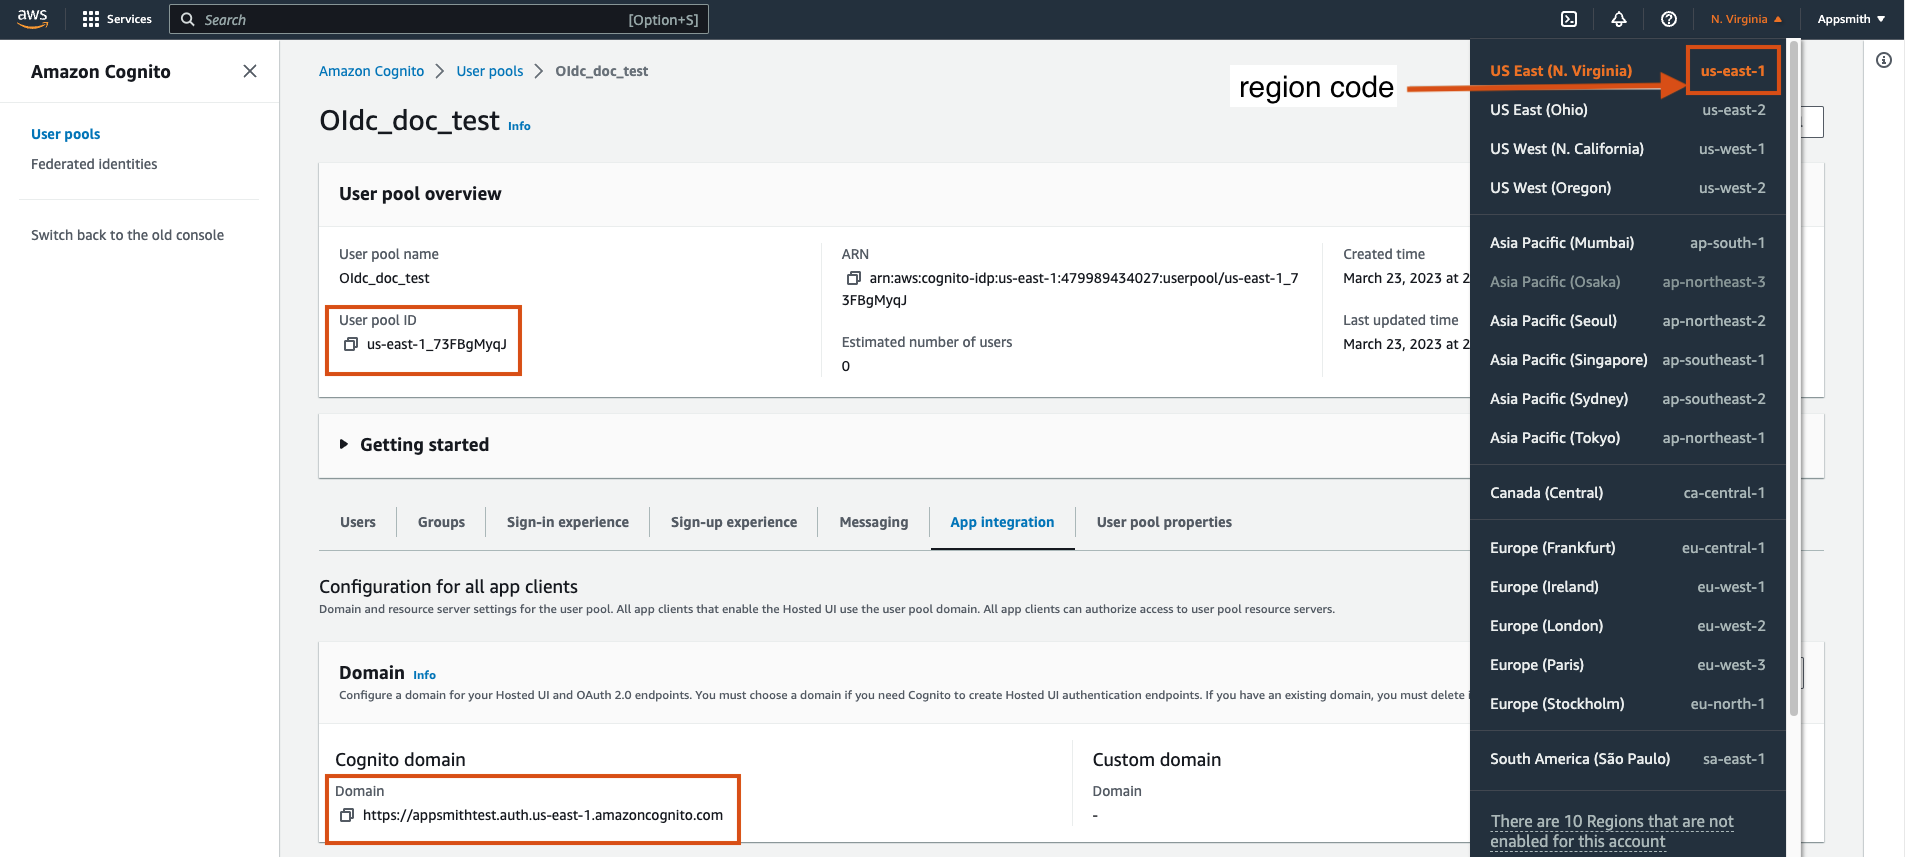
Configuration field Description Client ID Add the Client ID copied from the App Client in your user pool Client Secret Add the Client Secret copied from the App Client in your user pool Authorization URL Format - https://<user-pool_domain>/oauth2/authorize
user-pool_domain - The Cognito domain you created in the above step.Token URL Format - https://<user-pool_domain>/oauth2/token
user-pool_domain - The Cognito domain you created in the above step.User Info URL Format - https://<user-pool_domain>/oauth2/userInfo
user-pool_domain - The Cognito domain you created in the above stepJWK Set URL Format - https://cognito-idp.<region>.amazonaws.com/<user-pool-id>/.well-known/jwks.json
region - The region's code where your AWS Cognito is set up.
user-pool-id - The unique ID of the user pool you've created.
Save the changes and restart your application by clicking
SAVE & RESTARTbutton. If you try to login to Appsmith again, you'll see the SIGN IN WITH OIDC SSO button on the login screen.
